“eHouse CAN/RF” Smart Home – connect relay outputs to electrical devices
eHouse CAN home automation , connect the controller to the electrical and electronic equipment.
This information covers “eHouse CAN” and “eHouse RF” controllers.
The information contained herein is for informational not as guide.
Connecting to voltages greater than 50V requires installation by a qualified electrician (depending on jurisdiction). In the case of voltage 230V is necessary to turn off all fuses.
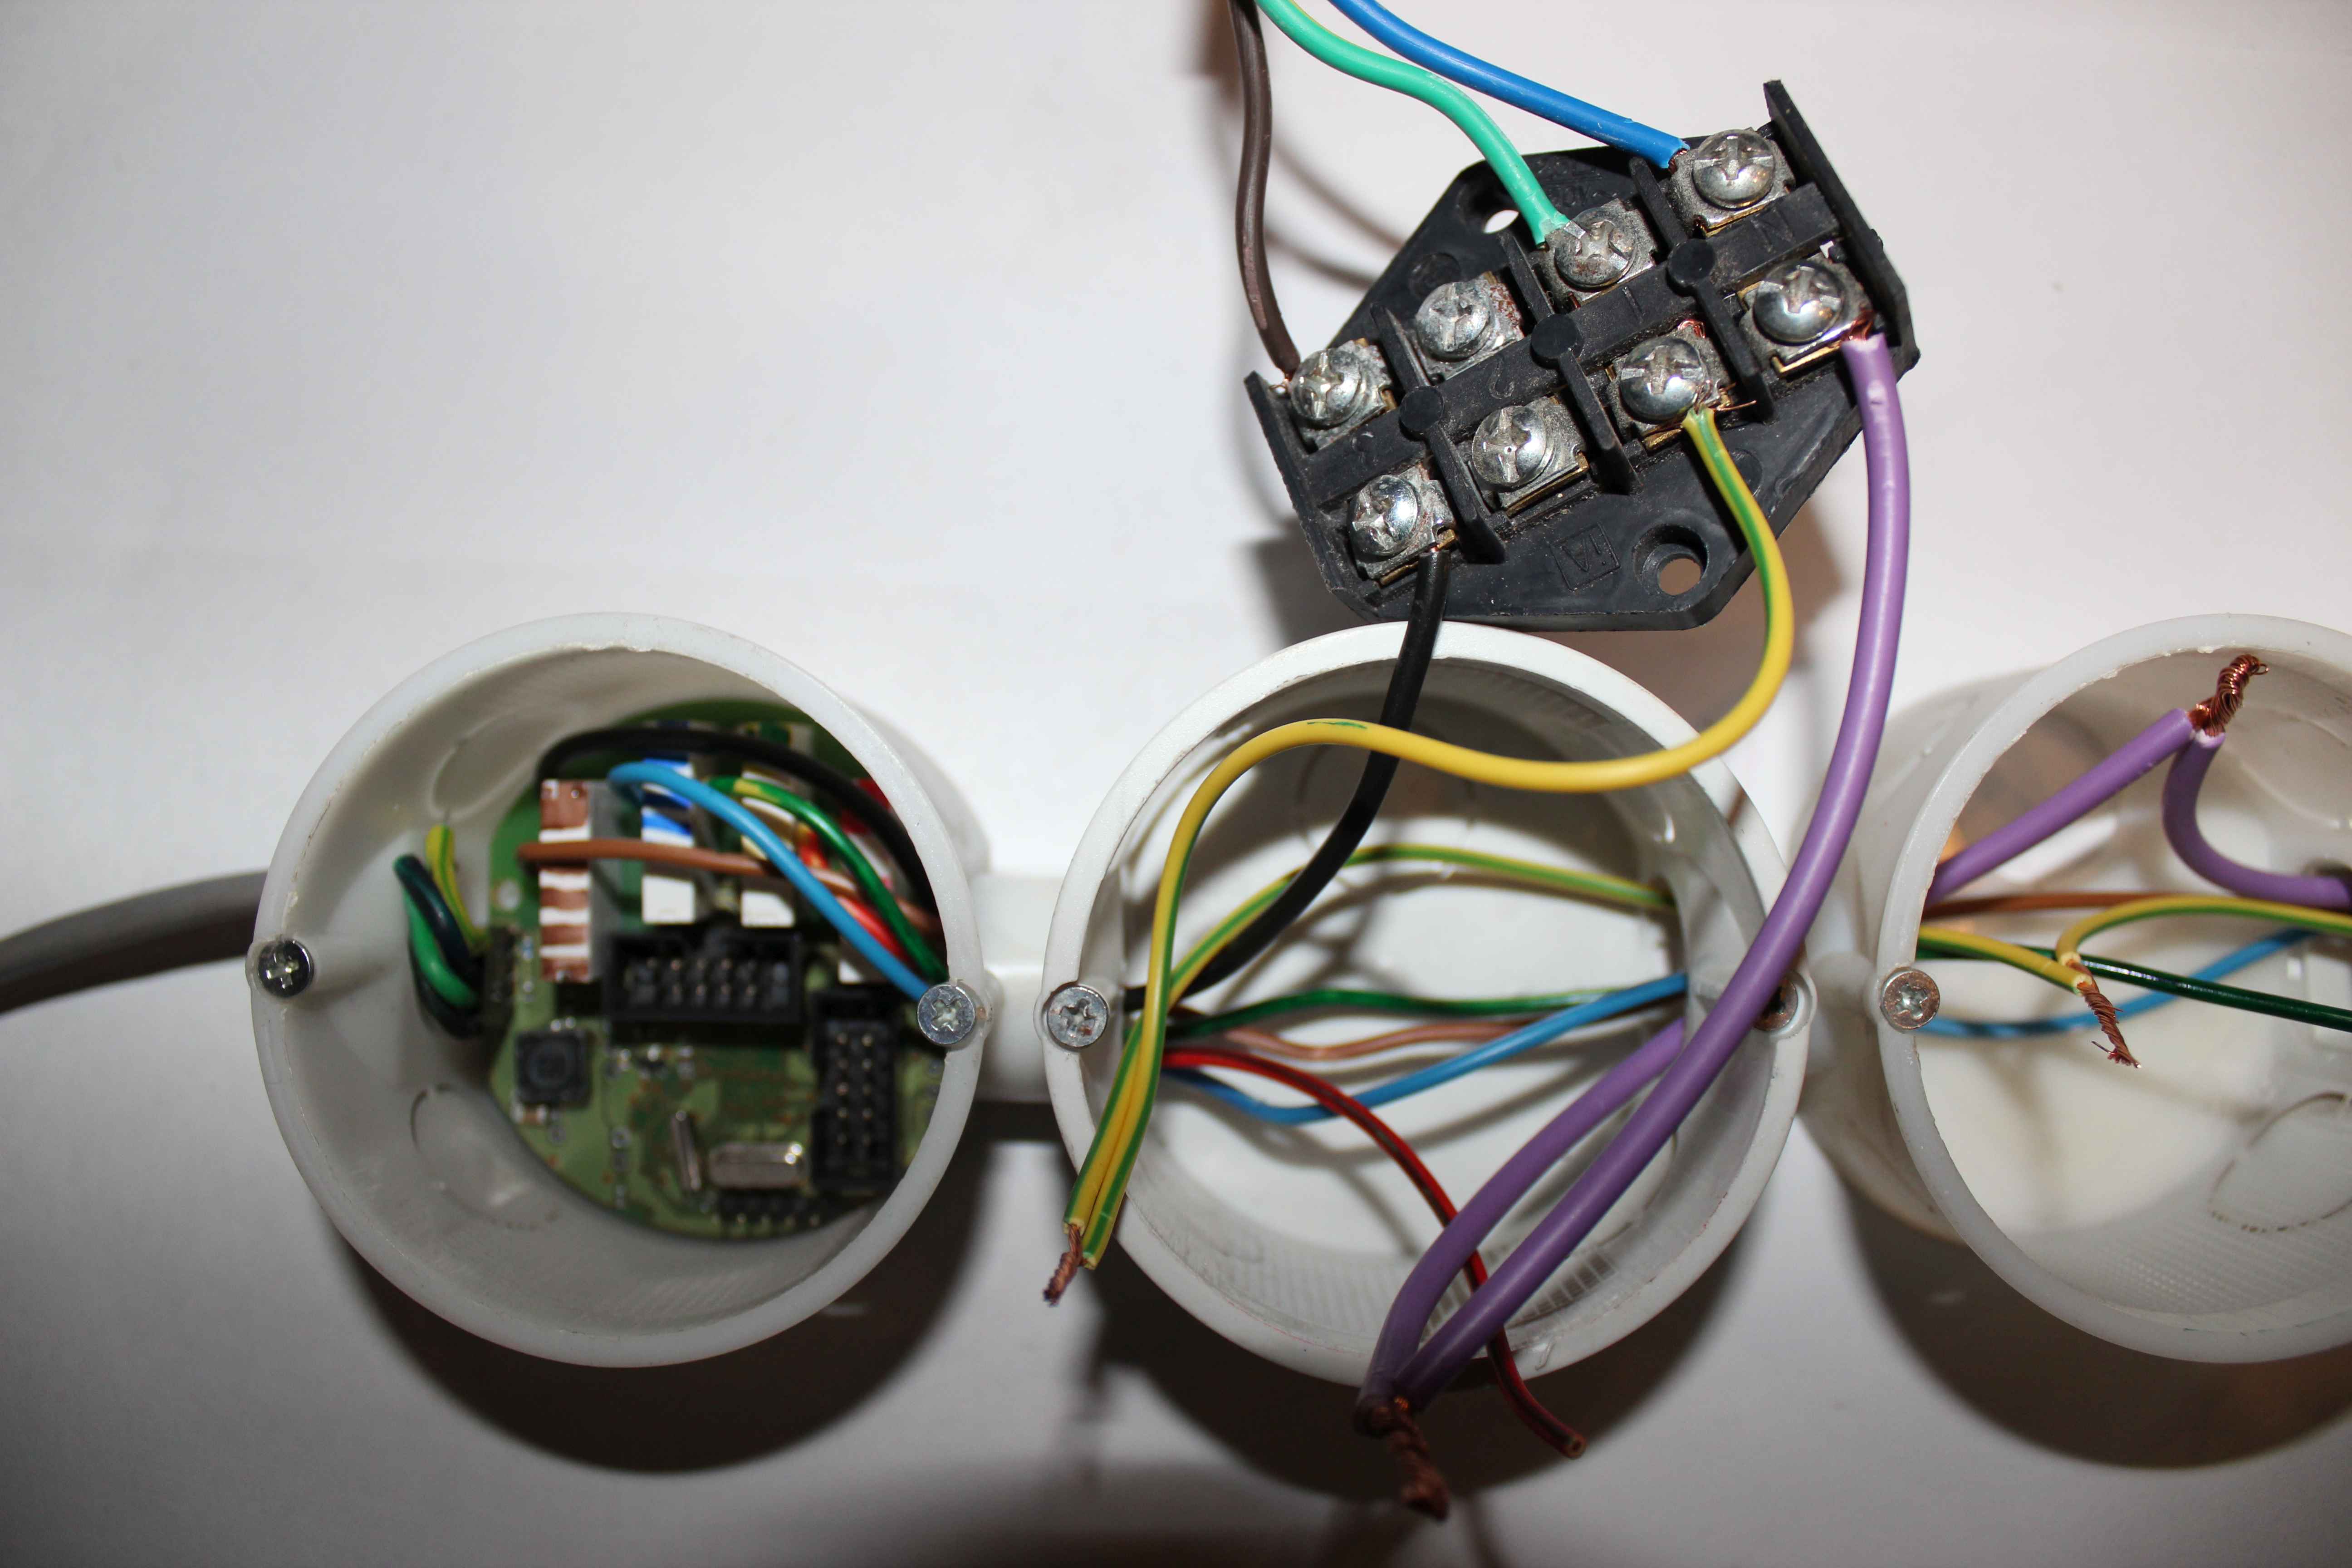
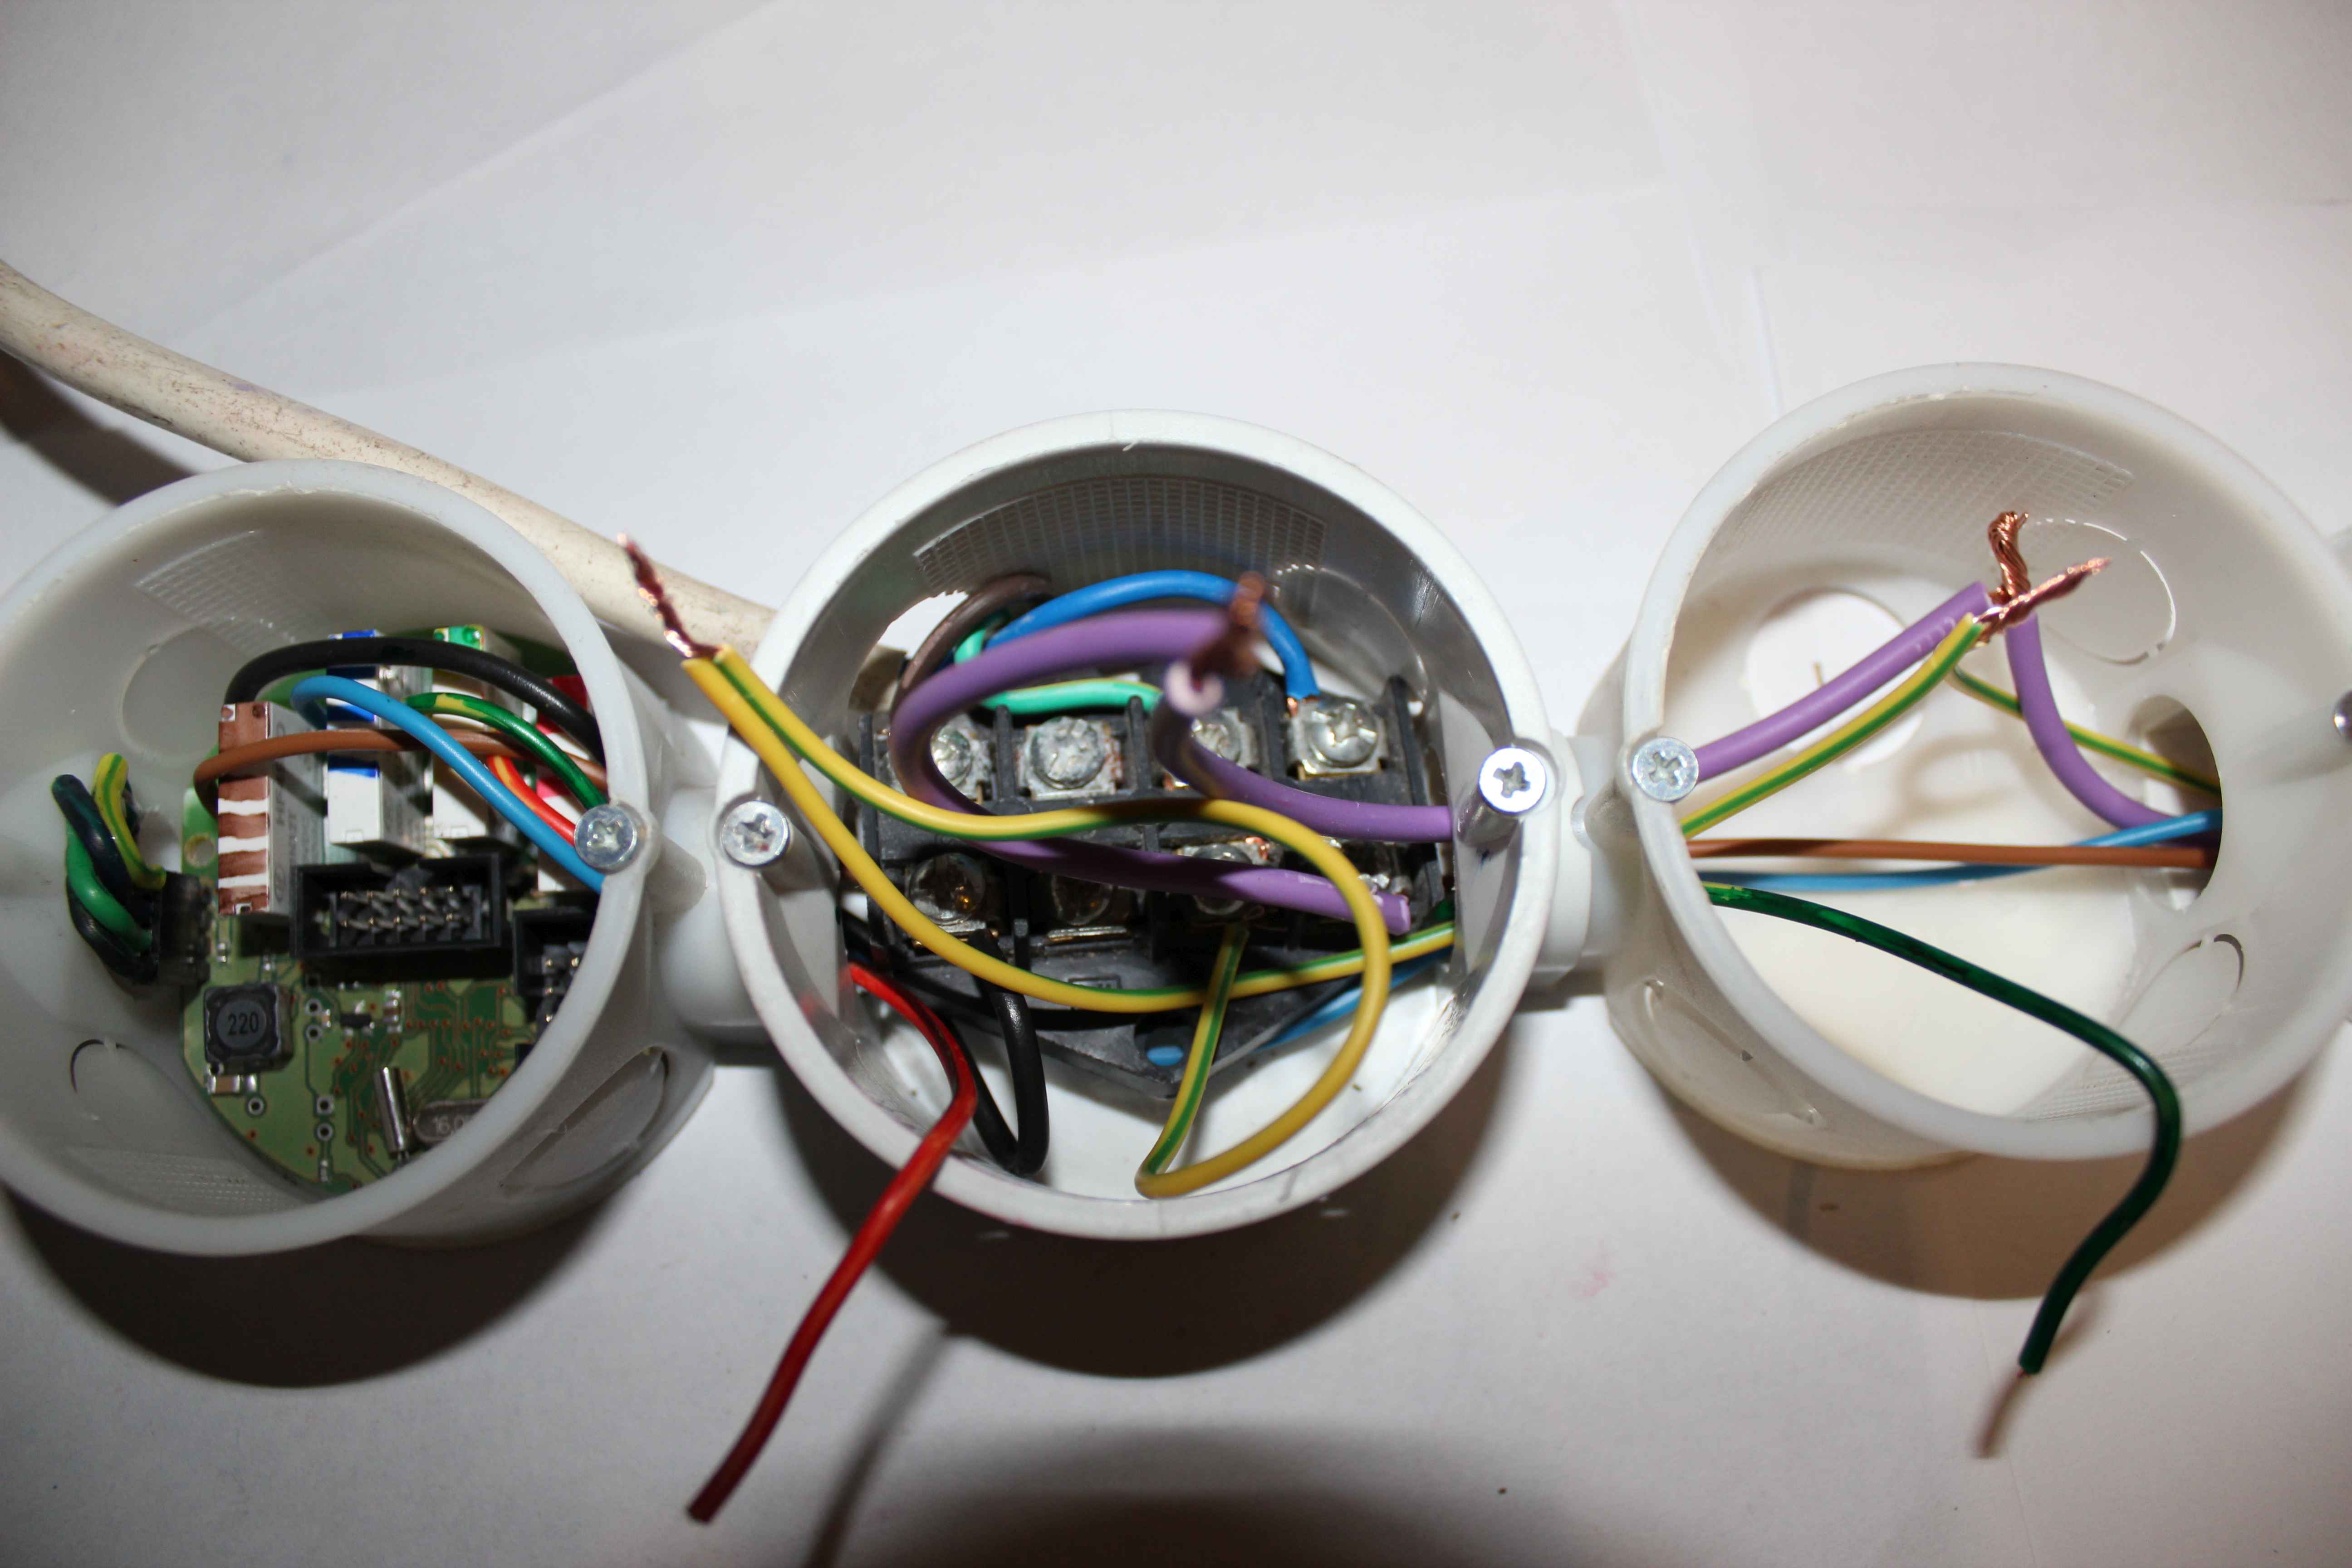
“eHouse CAN/RF” smart home controllers are mounted directly in the wall sockets inside cans. For convenience , use a deep box .
Before starting work, read posts: Smart Home eHouse CAN/RF connection and Smart Home eHouse CAN/RF connection of inputs measurement and digital.
For safety, the eHouse CAN/RF controller MUST be installed in a separate box (socket can) separated from 230V outlets, 230V cables.
All work must be performed without connecting the mains voltage and other voltages.
“eHouse CAN/RF” controllers have relay/dimmer modules 4 relays with maximal parameters: 230V/5A of resistive load.
For safety reason and to ensure a long, continuous and trouble-free operation, you should take the maximum current and voltage of 230V/2A and resistive load only.
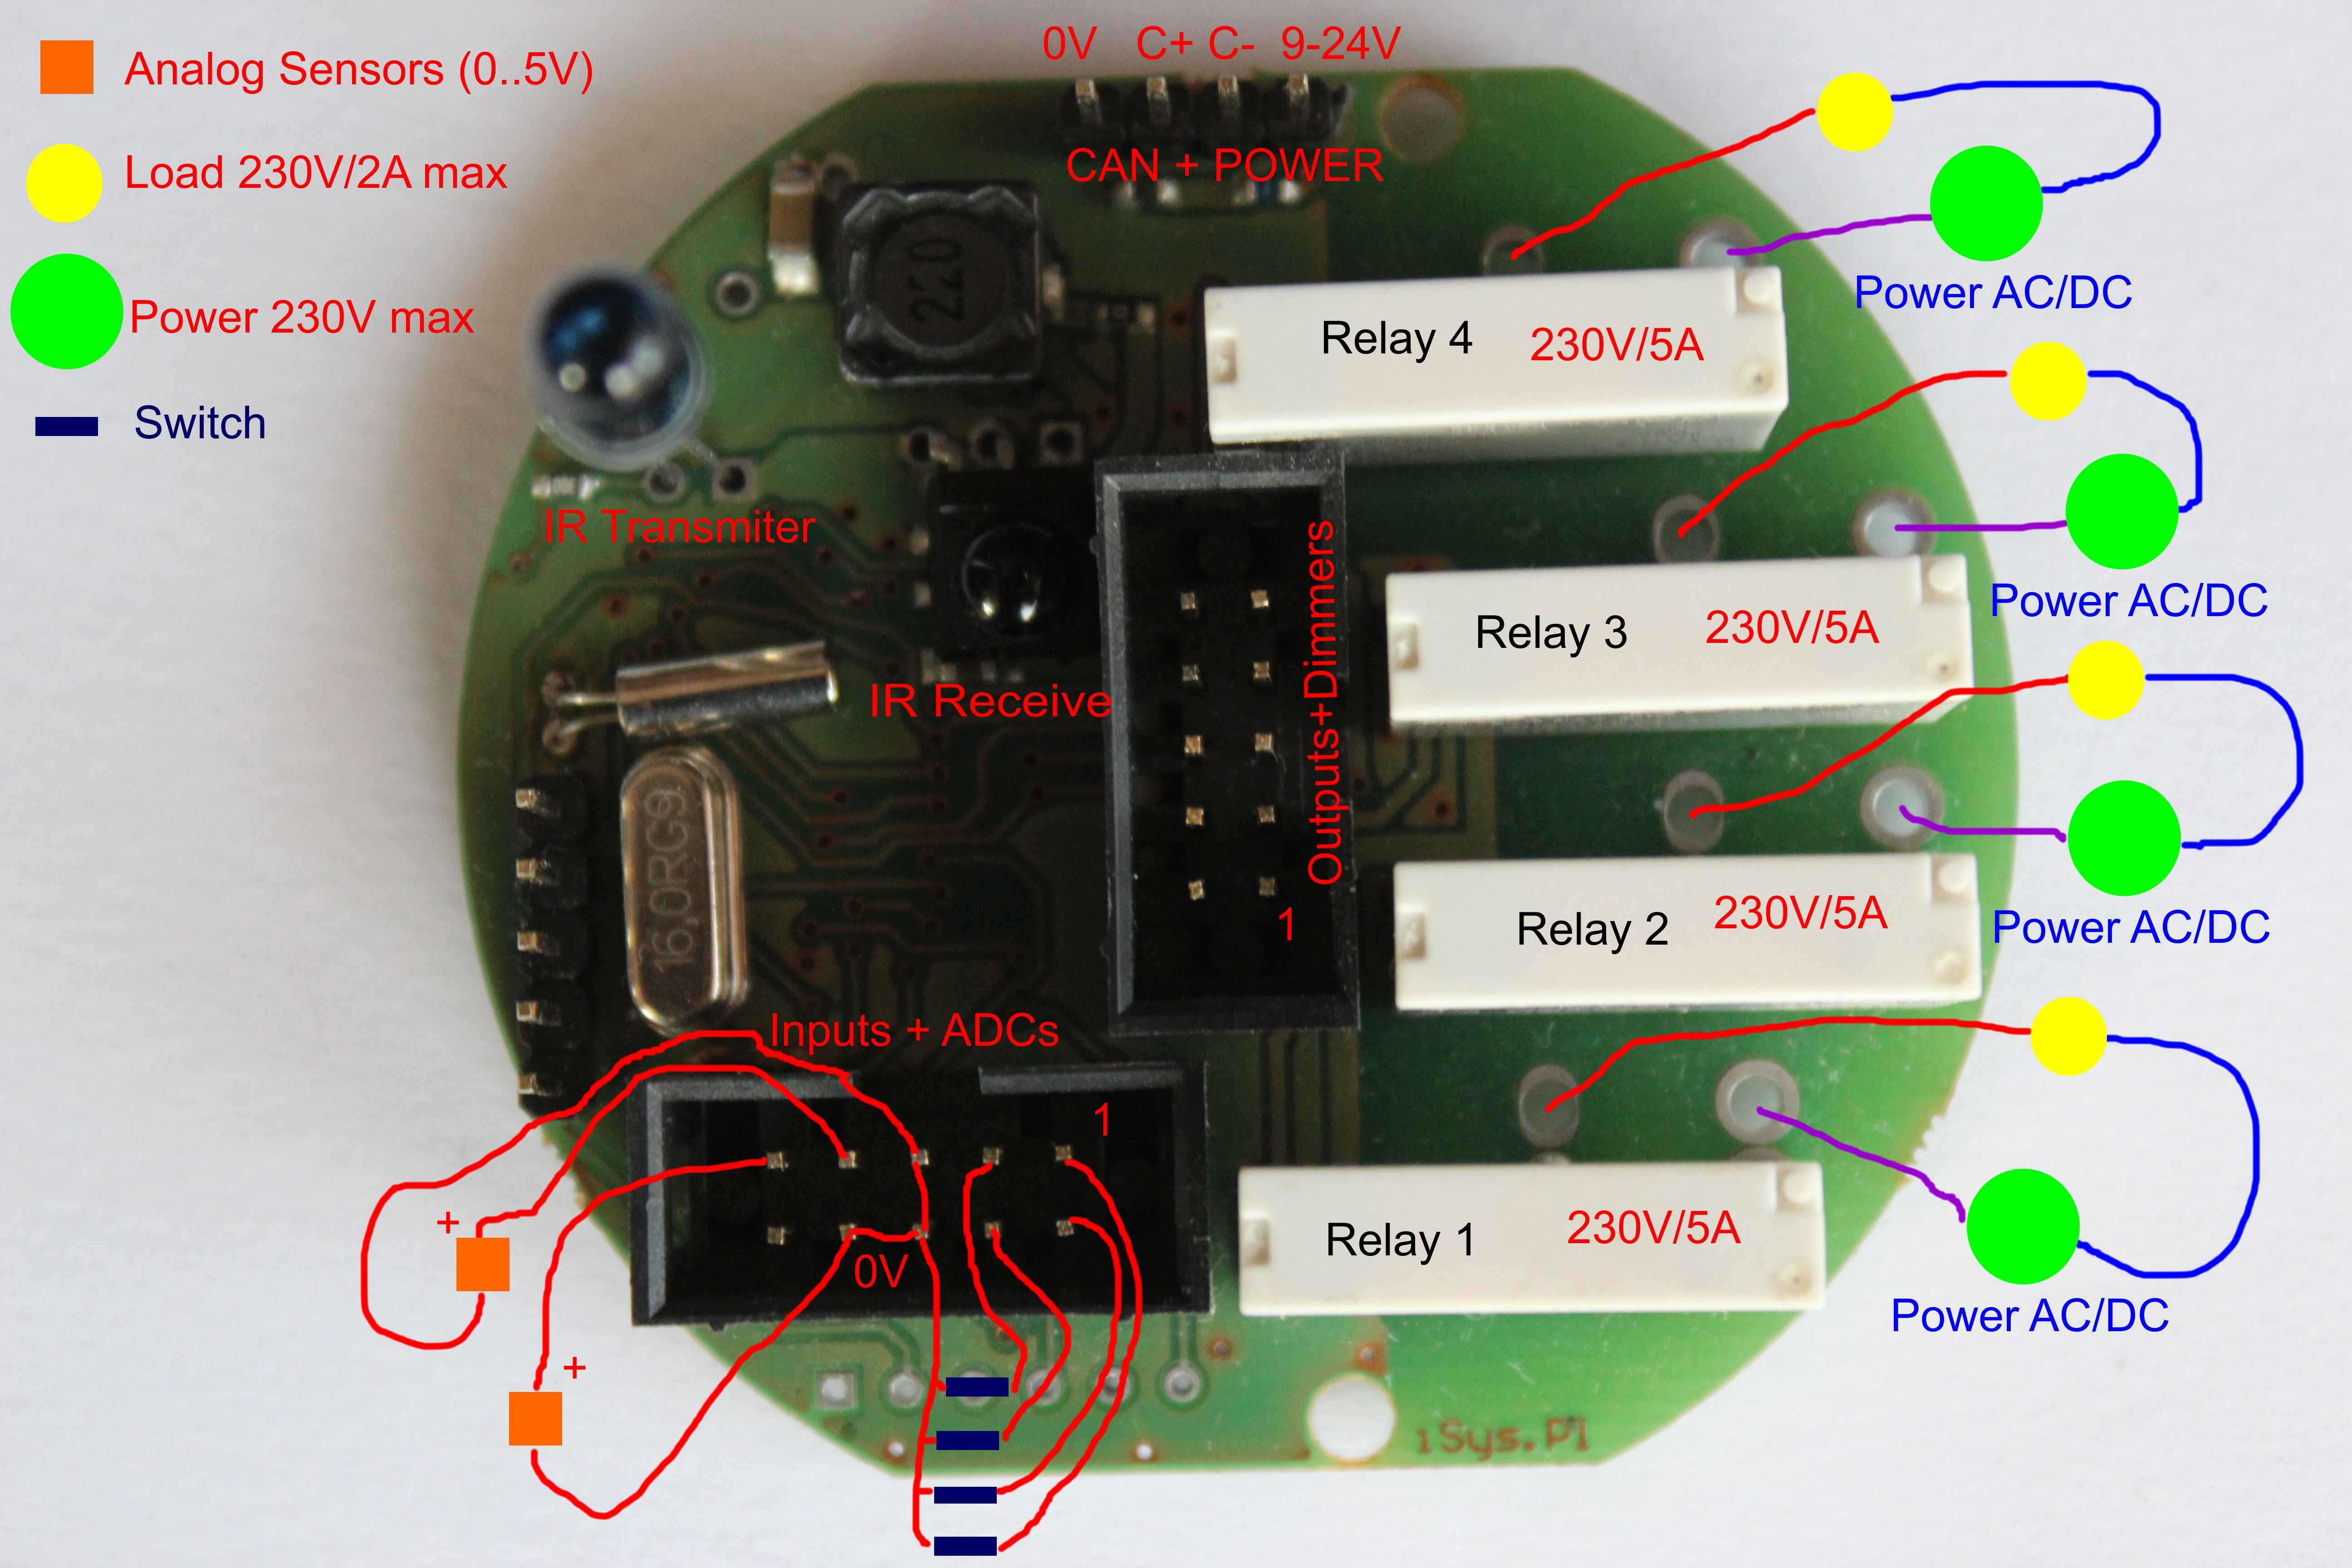
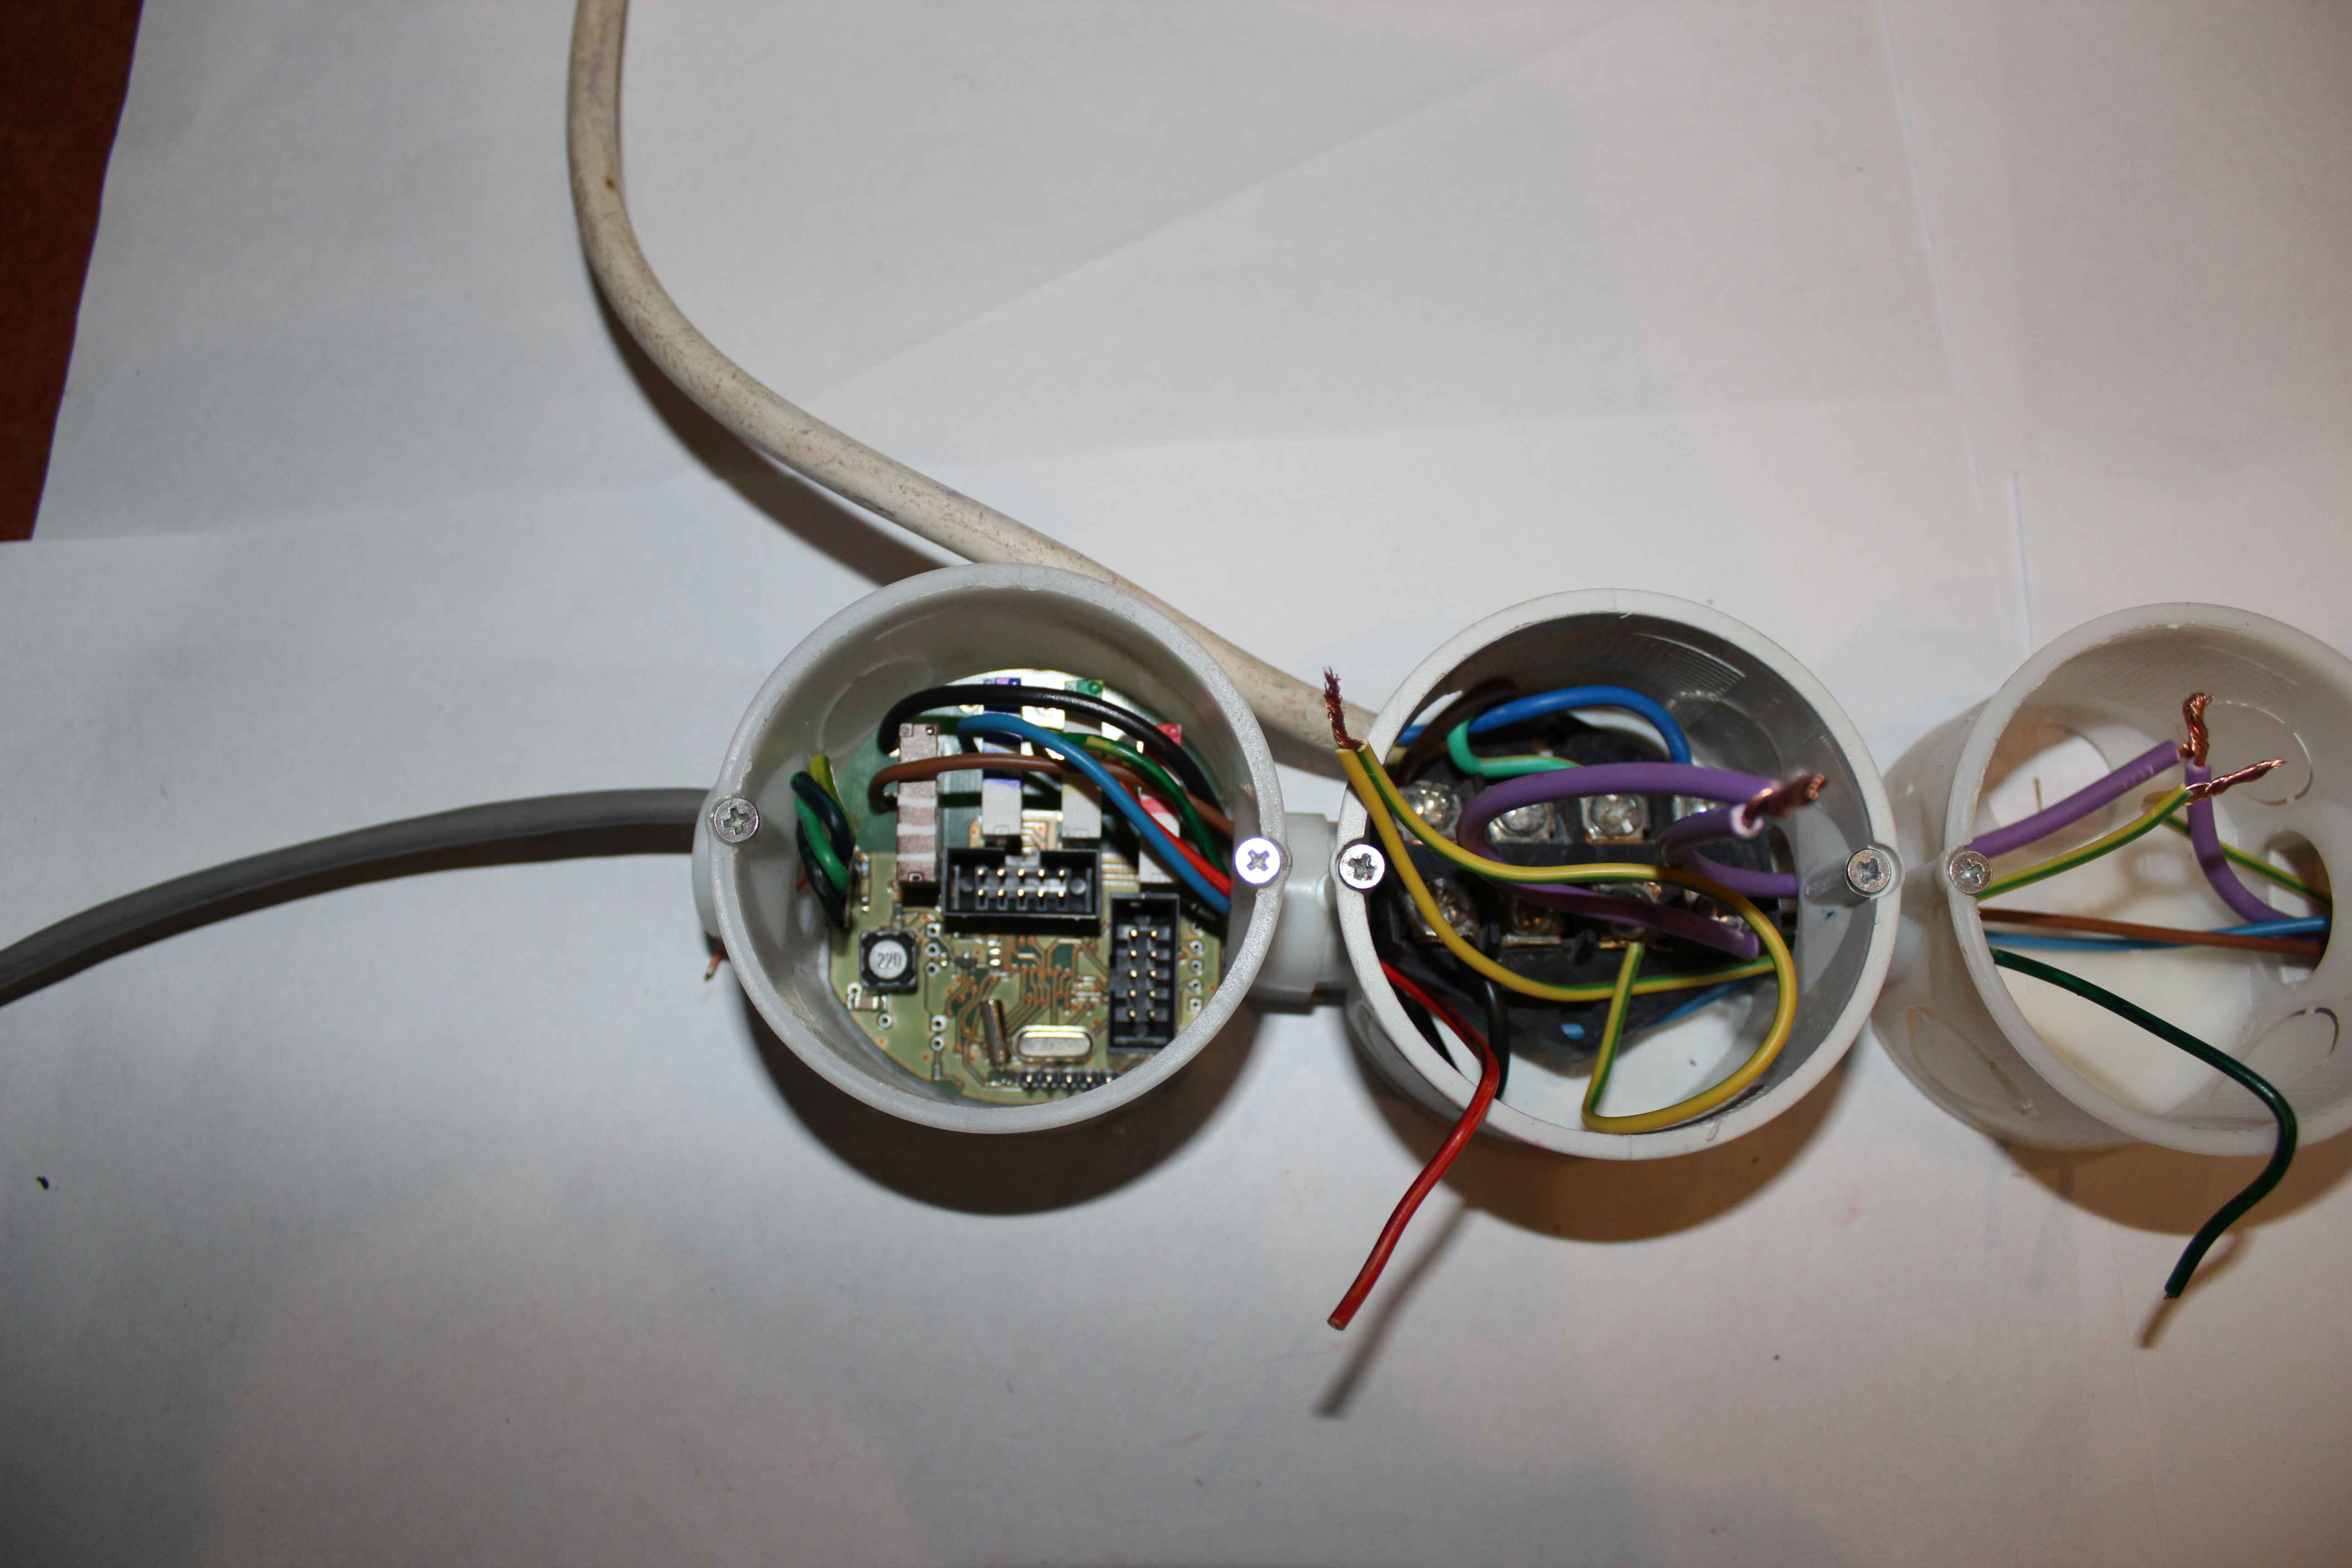
A simplified drawing showing the connection of actuators:
For installing the drivers and accessories necessary to use deep cans.
Load (electrical appliance), relay contacts, supply voltage connected in a closed loop.
Relay is a component that allows to separate low-voltage drivers from the external voltage and high power .
The relay contacts are equivalent to an ordinary switch ( short-circuited when power to the coil is supplied ) .
So the relay switches on or off voltage for the receiver power.
There are 2 ways to connect the load to relay contacts depending on your preference and convenience of installers :
- independent switches for enabling devices to different voltage
- joint switches allow the inclusion of only one voltage
Regardless connected relay contacts , each switch is separated from the other :
The advantage is the possibility of integrating several independent voltage max 4 for all relays.
The disadvantage of a large number of 230V wires (8) difficult to package in small electrical can .
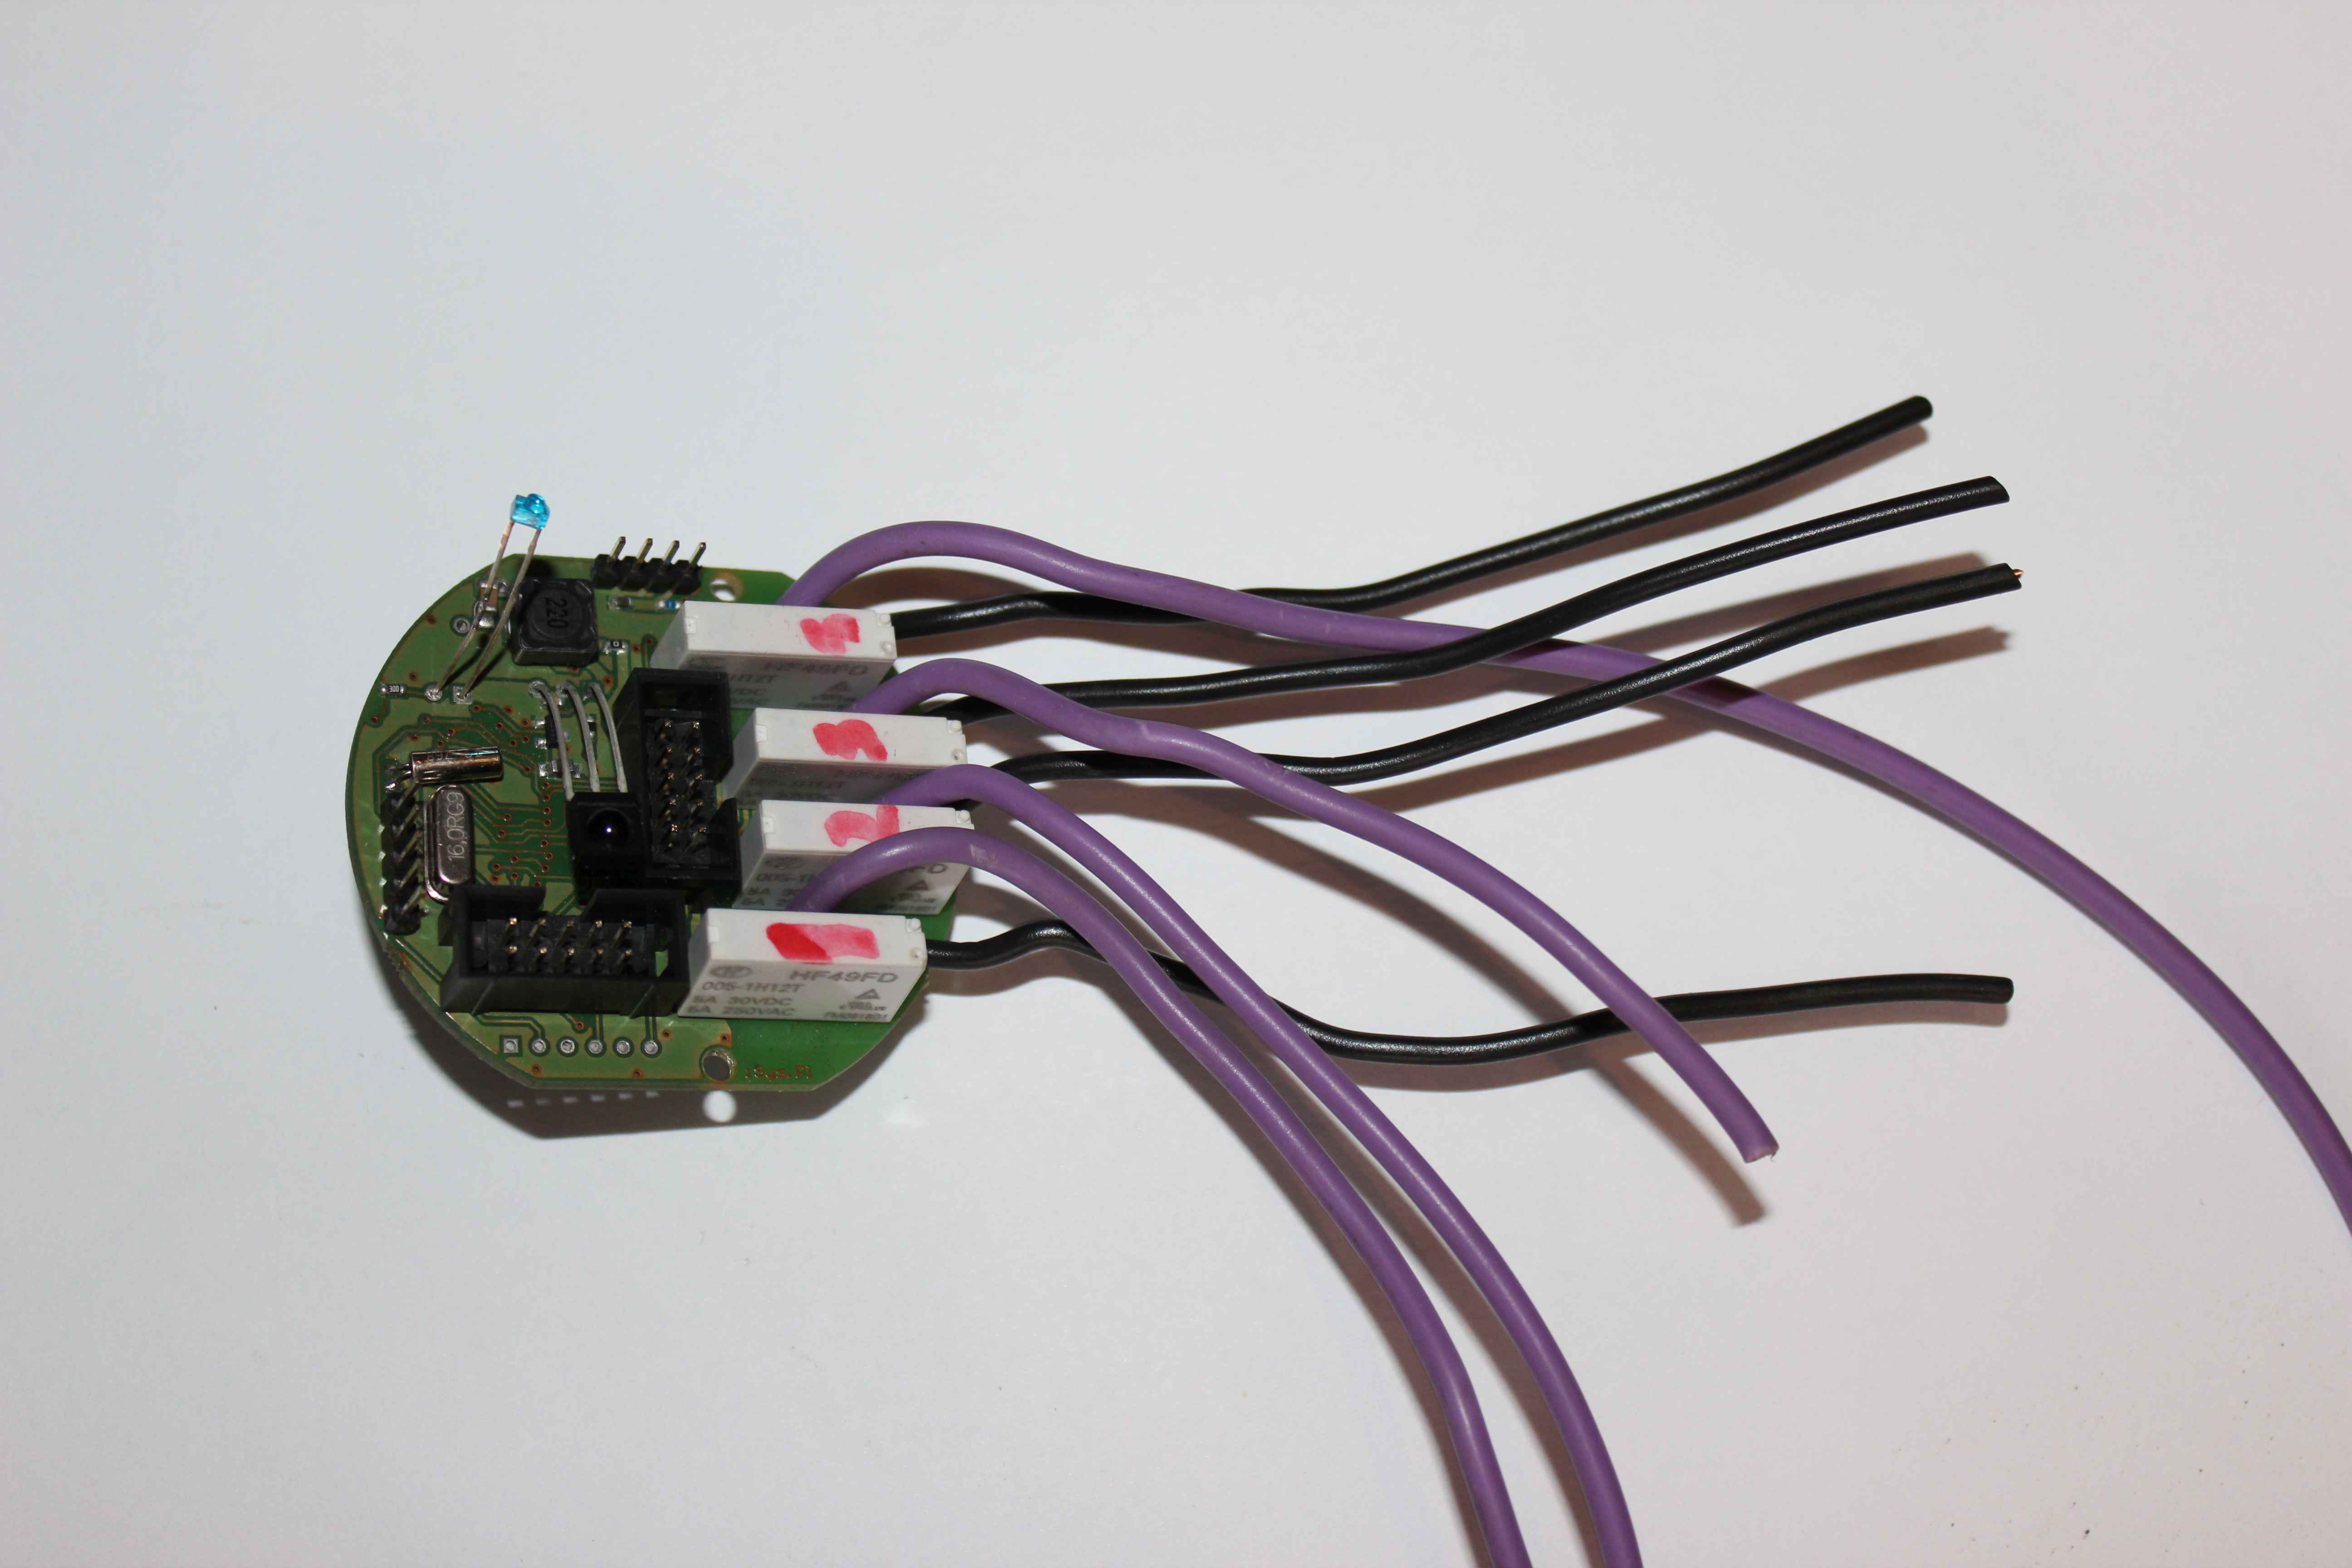
Common relay contacts shortened. On the controller board outermost solder pads must be shorted 4 for all relays .
Disadvantage: the ability to turn only one voltage typically 230V
Advantage: much less 230V wires (5) .
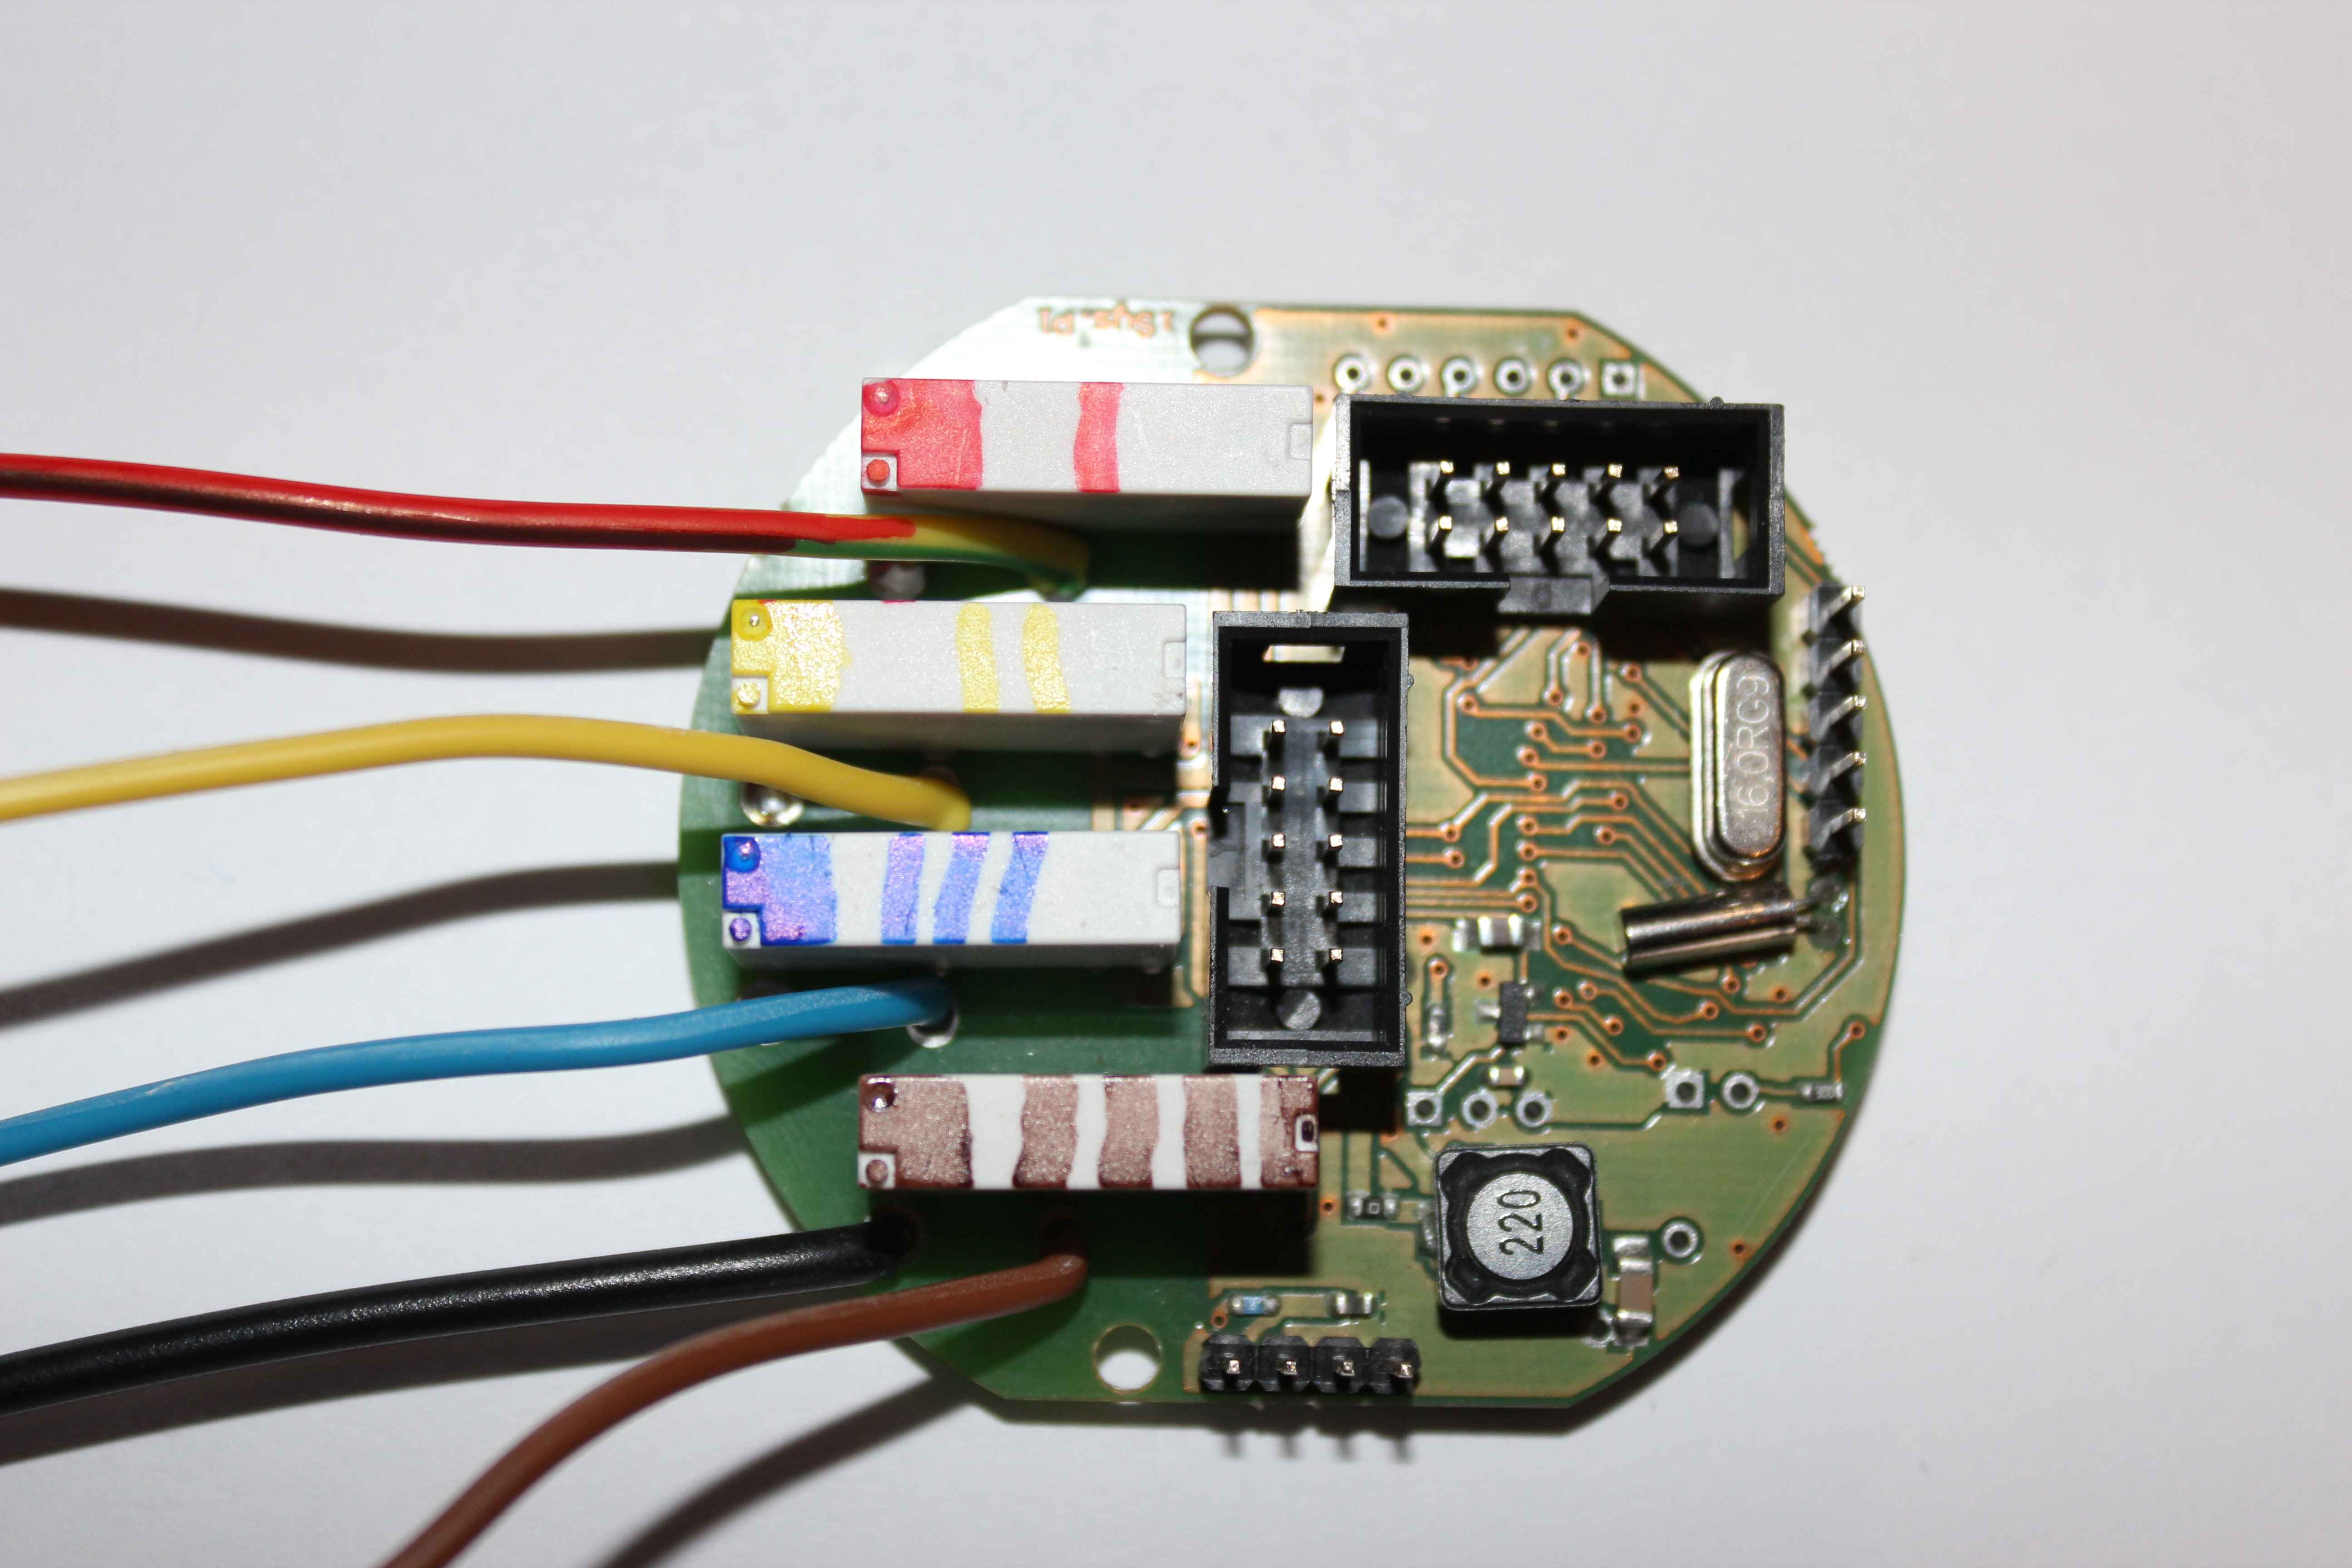
According to the color: black wire is common , other colors are starting each relay contacts (switches) .
In this case
- Output 1 : red
- Output 2 : green / yellow
- Output 3 : blue
- Output 4 : Brown
Do not mount sockets and accessories in the same box as the controller.
In case of wrong installation there is risk of shorting to 230V voltage, which would damage to all drivers in the system
Keep in mind that even insects or rodents can cause a short circuit sufficient to damage all electronics.
Very good solution is thick paint of PCB with insulating protective varnish or other means of insulation before installation in the can.
 The more flexible are 230V cables, the easier and shorten would be assembling process.
Common wire (black) should have a minimal diameter of 1.5mm2, other colors just 1mm2 for voltages 230V and current up to 2A per output.
Common wire (black) connect the power connector (phase = 230 V (Brown)).
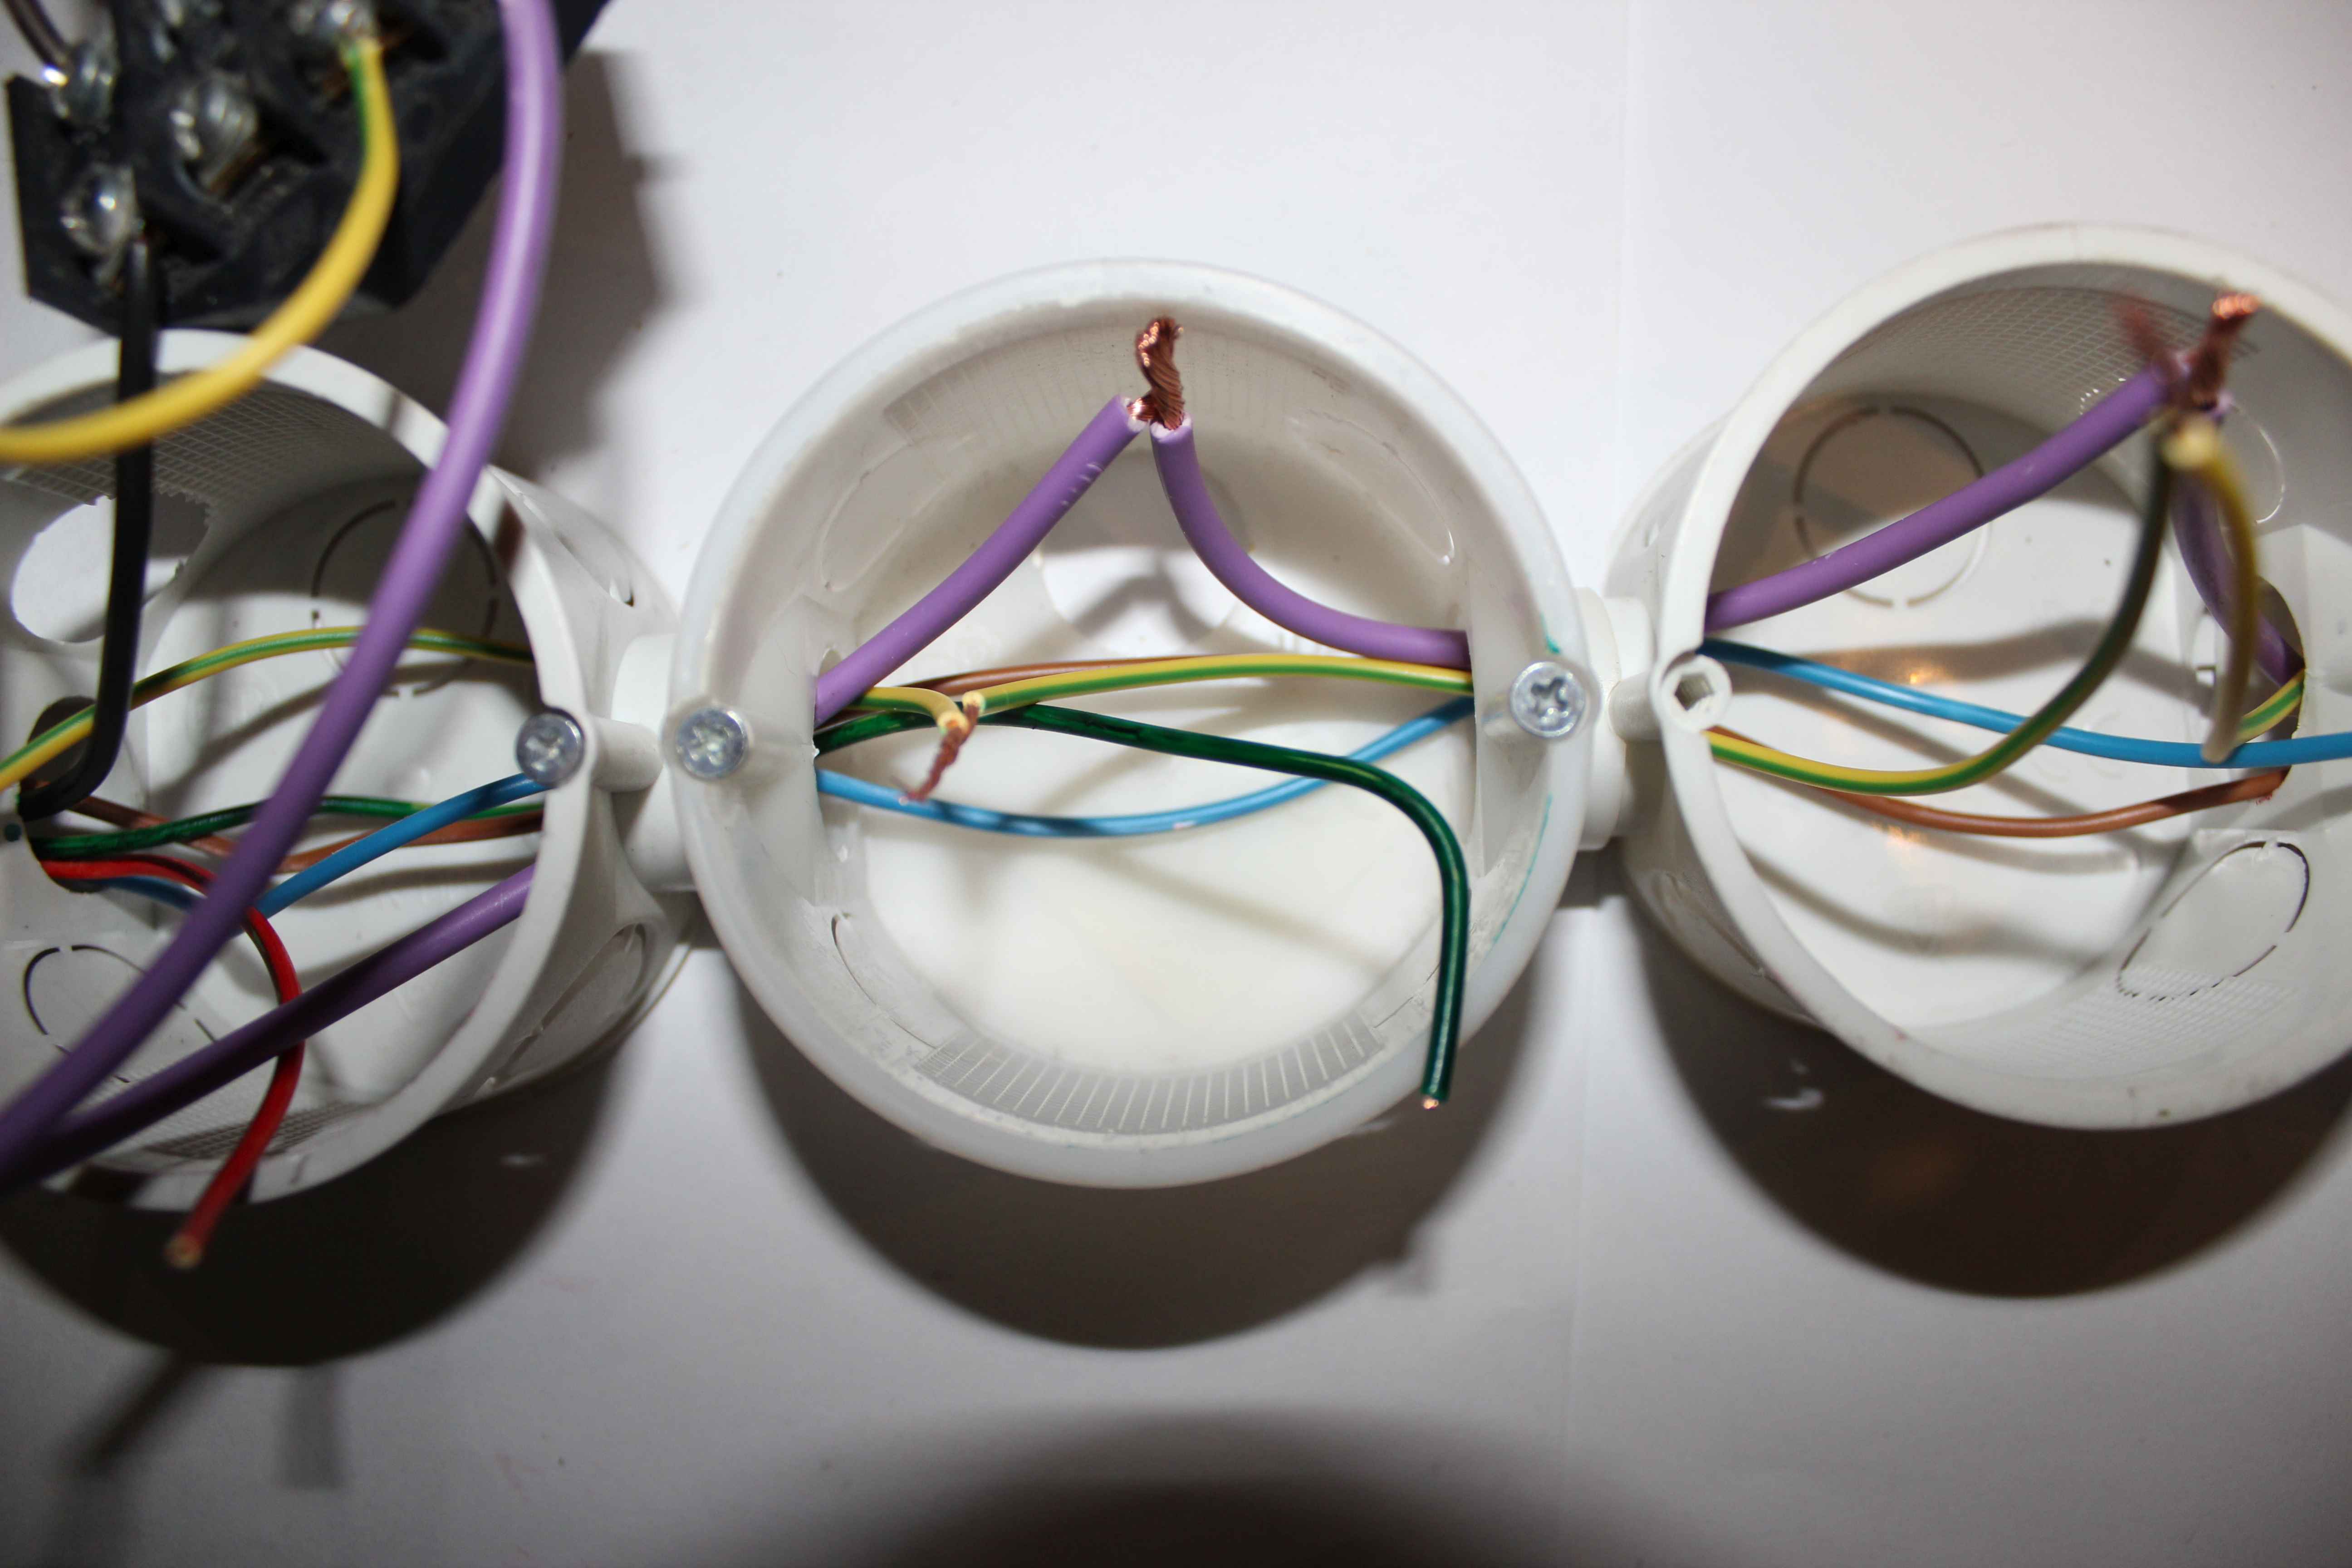
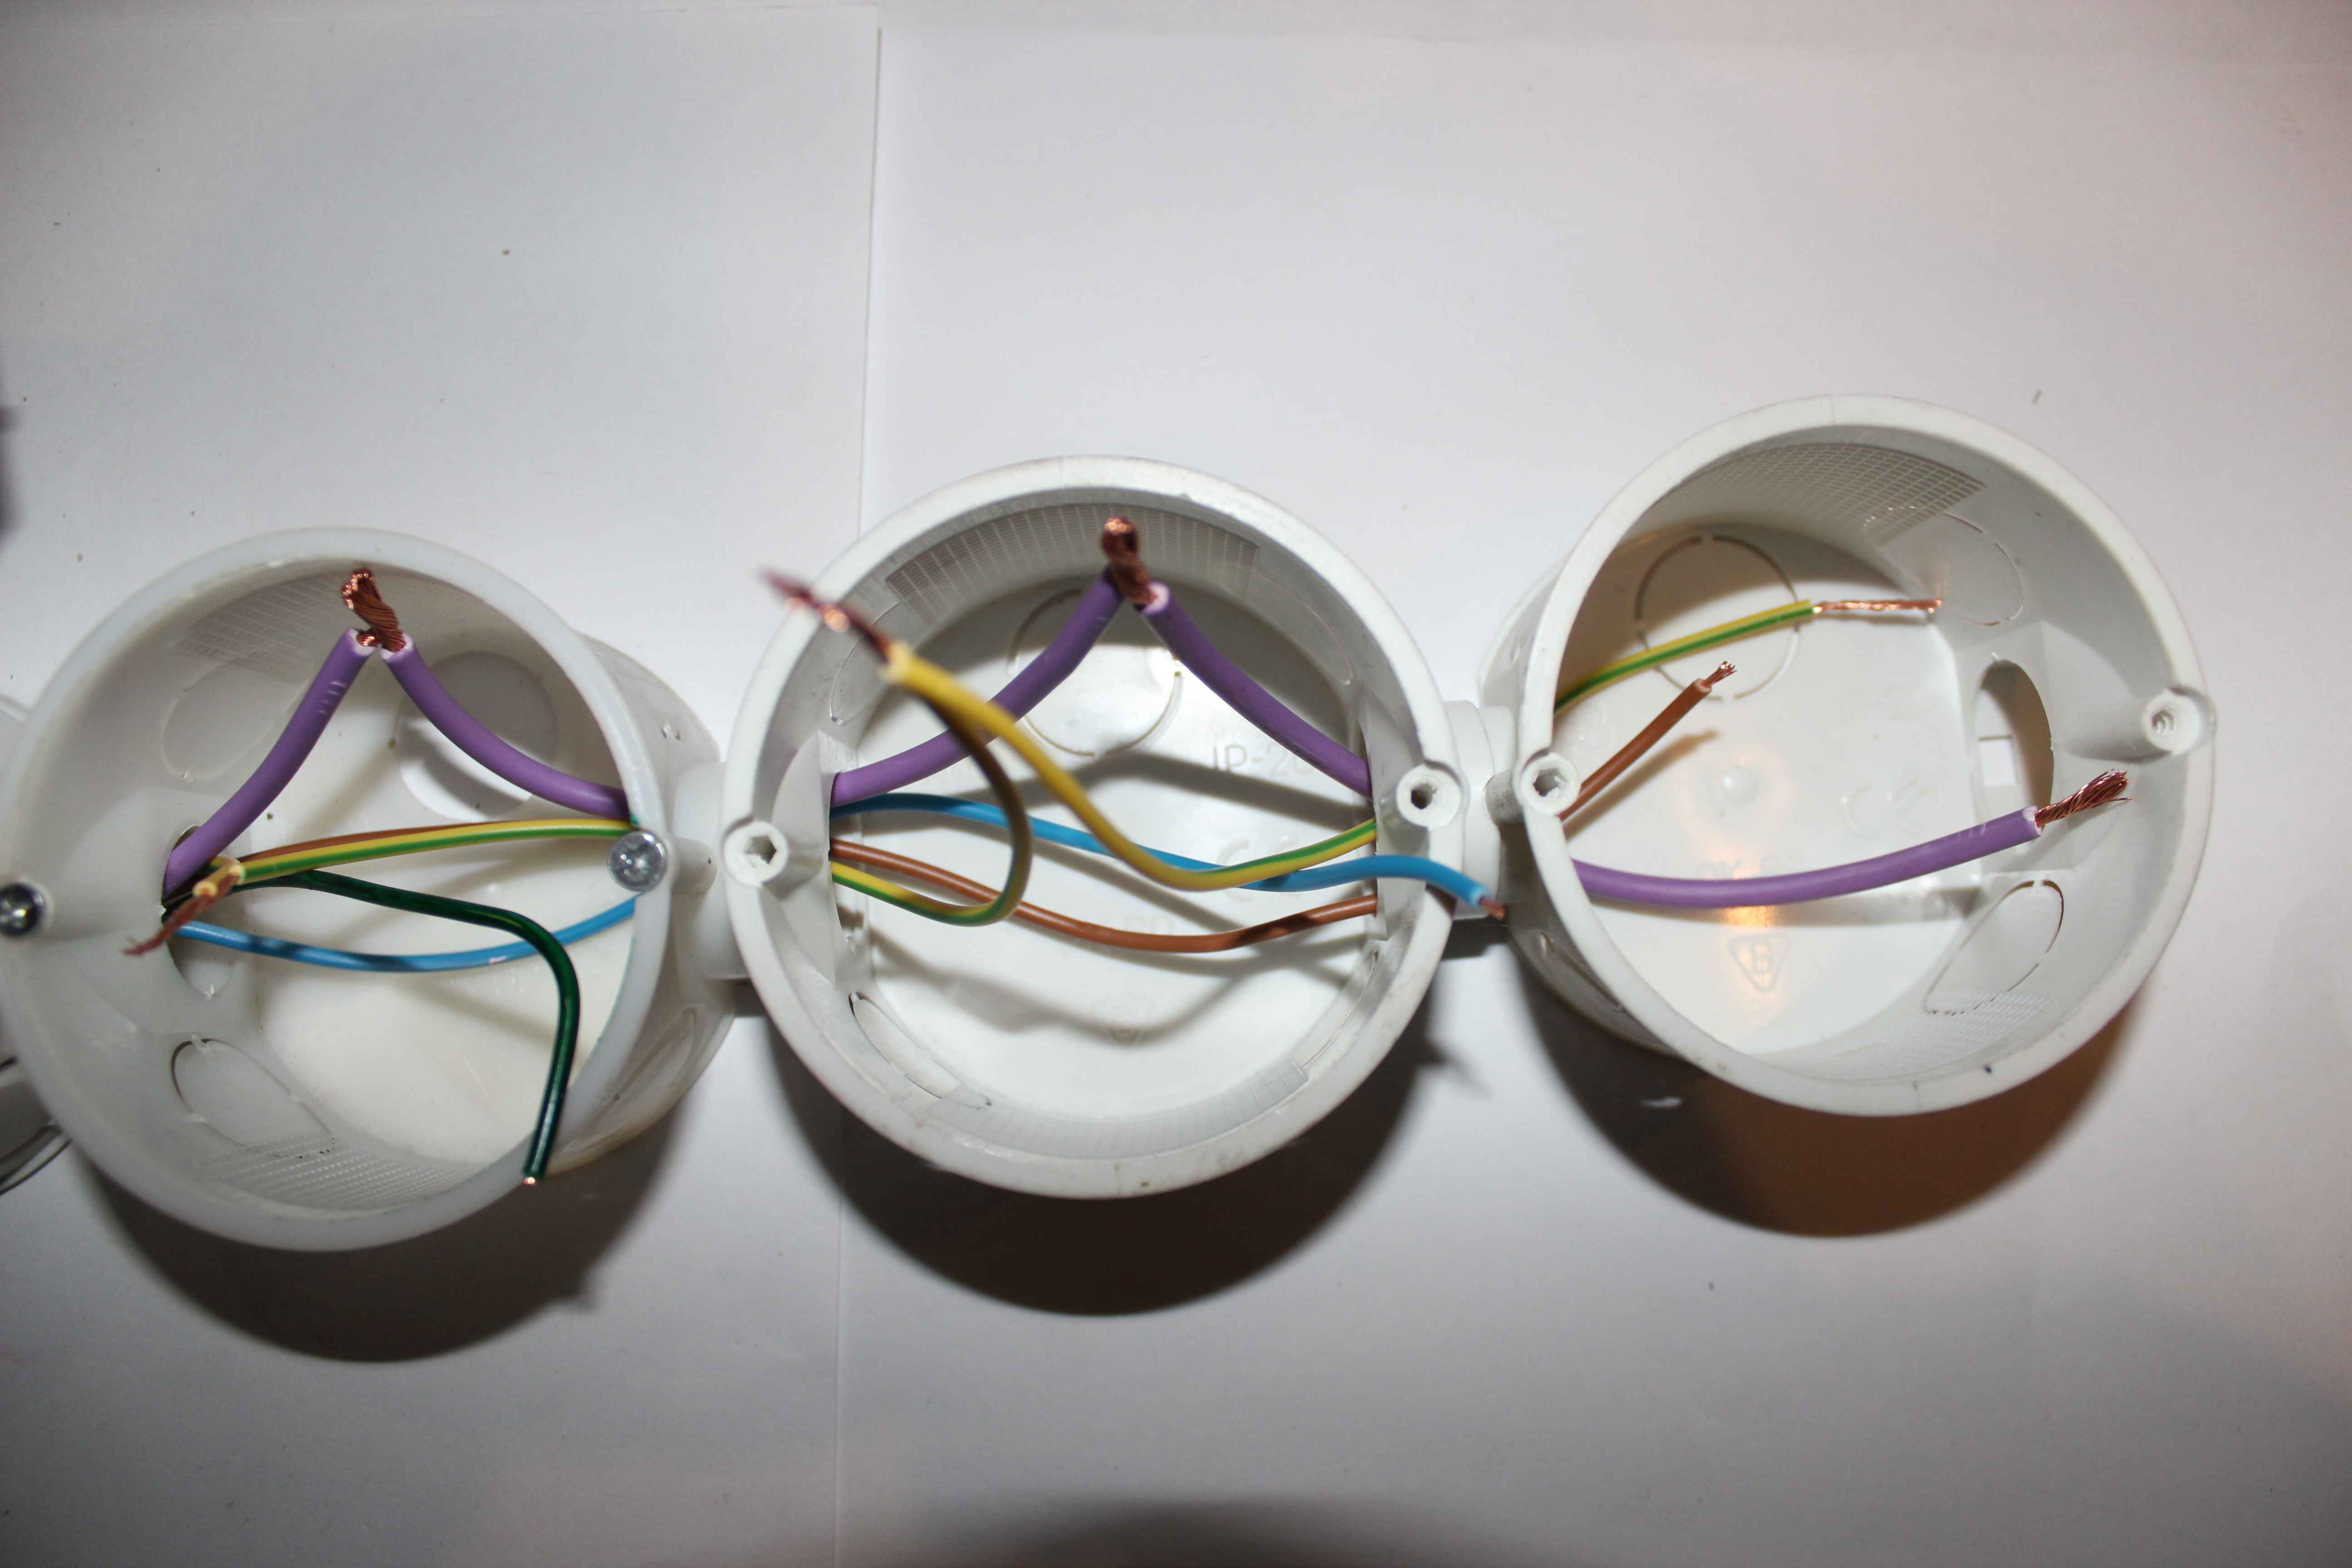
The neutral wire (blue) from the power supply series are distributed to each subsequent box (diameter 1.5mm2).
The protective wire (yellow-green) from the power supply serially are distributed to each subsequent box (diameter 1mm2).
Colored wires from the controller (relay contacts) are distributed in towards each of the can ( to include supply voltage {phase} ).
The blue wire in each box plugs into a 230V socket – N (Neutral).
yellow-green cable in each box plugs into a 230V socket , to the protective terminal (pin) .
Colored wires are connected sequentially to each receptacle 230V , to terminal L (load) – phase.
Connecting 230V cable should have a diameter greater than 1.5mm2 . It is distributed in series across the whole premises as a standard electric installation. The switching for each such segment , use the fuse overcurrent – the value of current required for a given room.